> ## Documentation Index
> Fetch the complete documentation index at: https://docs.gegentic.com/llms.txt
> Use this file to discover all available pages before exploring further.
# Making Your First Request
> Integrate Gegentica and secure your first LLM call in a few minutes.
## 1. Create your account, organization, and project
[Create](https://app.gegentic-ai.com/auth) or [log in](https://app.gegentic-ai.com/sign-in) to your Gegentica account. On first sign-up you'll be prompted to create an **organization** and a **[project](/projects)** — this is a one-time setup step. You can create additional projects later from the Projects page.
Want to run Gegentica on your own machine instead of using the hosted app? See [Run Gegentica Locally with Quickstart](/self-hosting).
## 2. Set up your AI Providers
Before you can approve any use case, connect the AI providers (OpenAI, Anthropic, Azure OpenAI, etc.) your agents will call. AI Providers are configured once at the organization level under **Settings > AI Providers**, and the credentials are shared across all projects in the org.
Add the provider, paste in your provider API key, and save. You can connect as many providers as you need.
## 3. Define an AI Use Case
Within your project, go to **Governance > AI Use Cases** and create one. An [AI Use Case](/governance/ai-use-cases) is the approval boundary for a provider + model combination — you can't create an agent against a provider or model that hasn't been approved here first.
Set the use case **name**, **AI Provider** (from the providers you connected in step 2), **Allowed Models**, and a **Risk Rating**. Submit it for confirmation if your organization requires use case approval before it can be used.
## 4. Create an AI Agent
Go to **Governance > AI Agents** and create one. An [AI Agent](/governance/ai-agents) is the running instance that actually serves requests — it inherits its provider, models, and default prompt from the **Approved Use Case** you select.
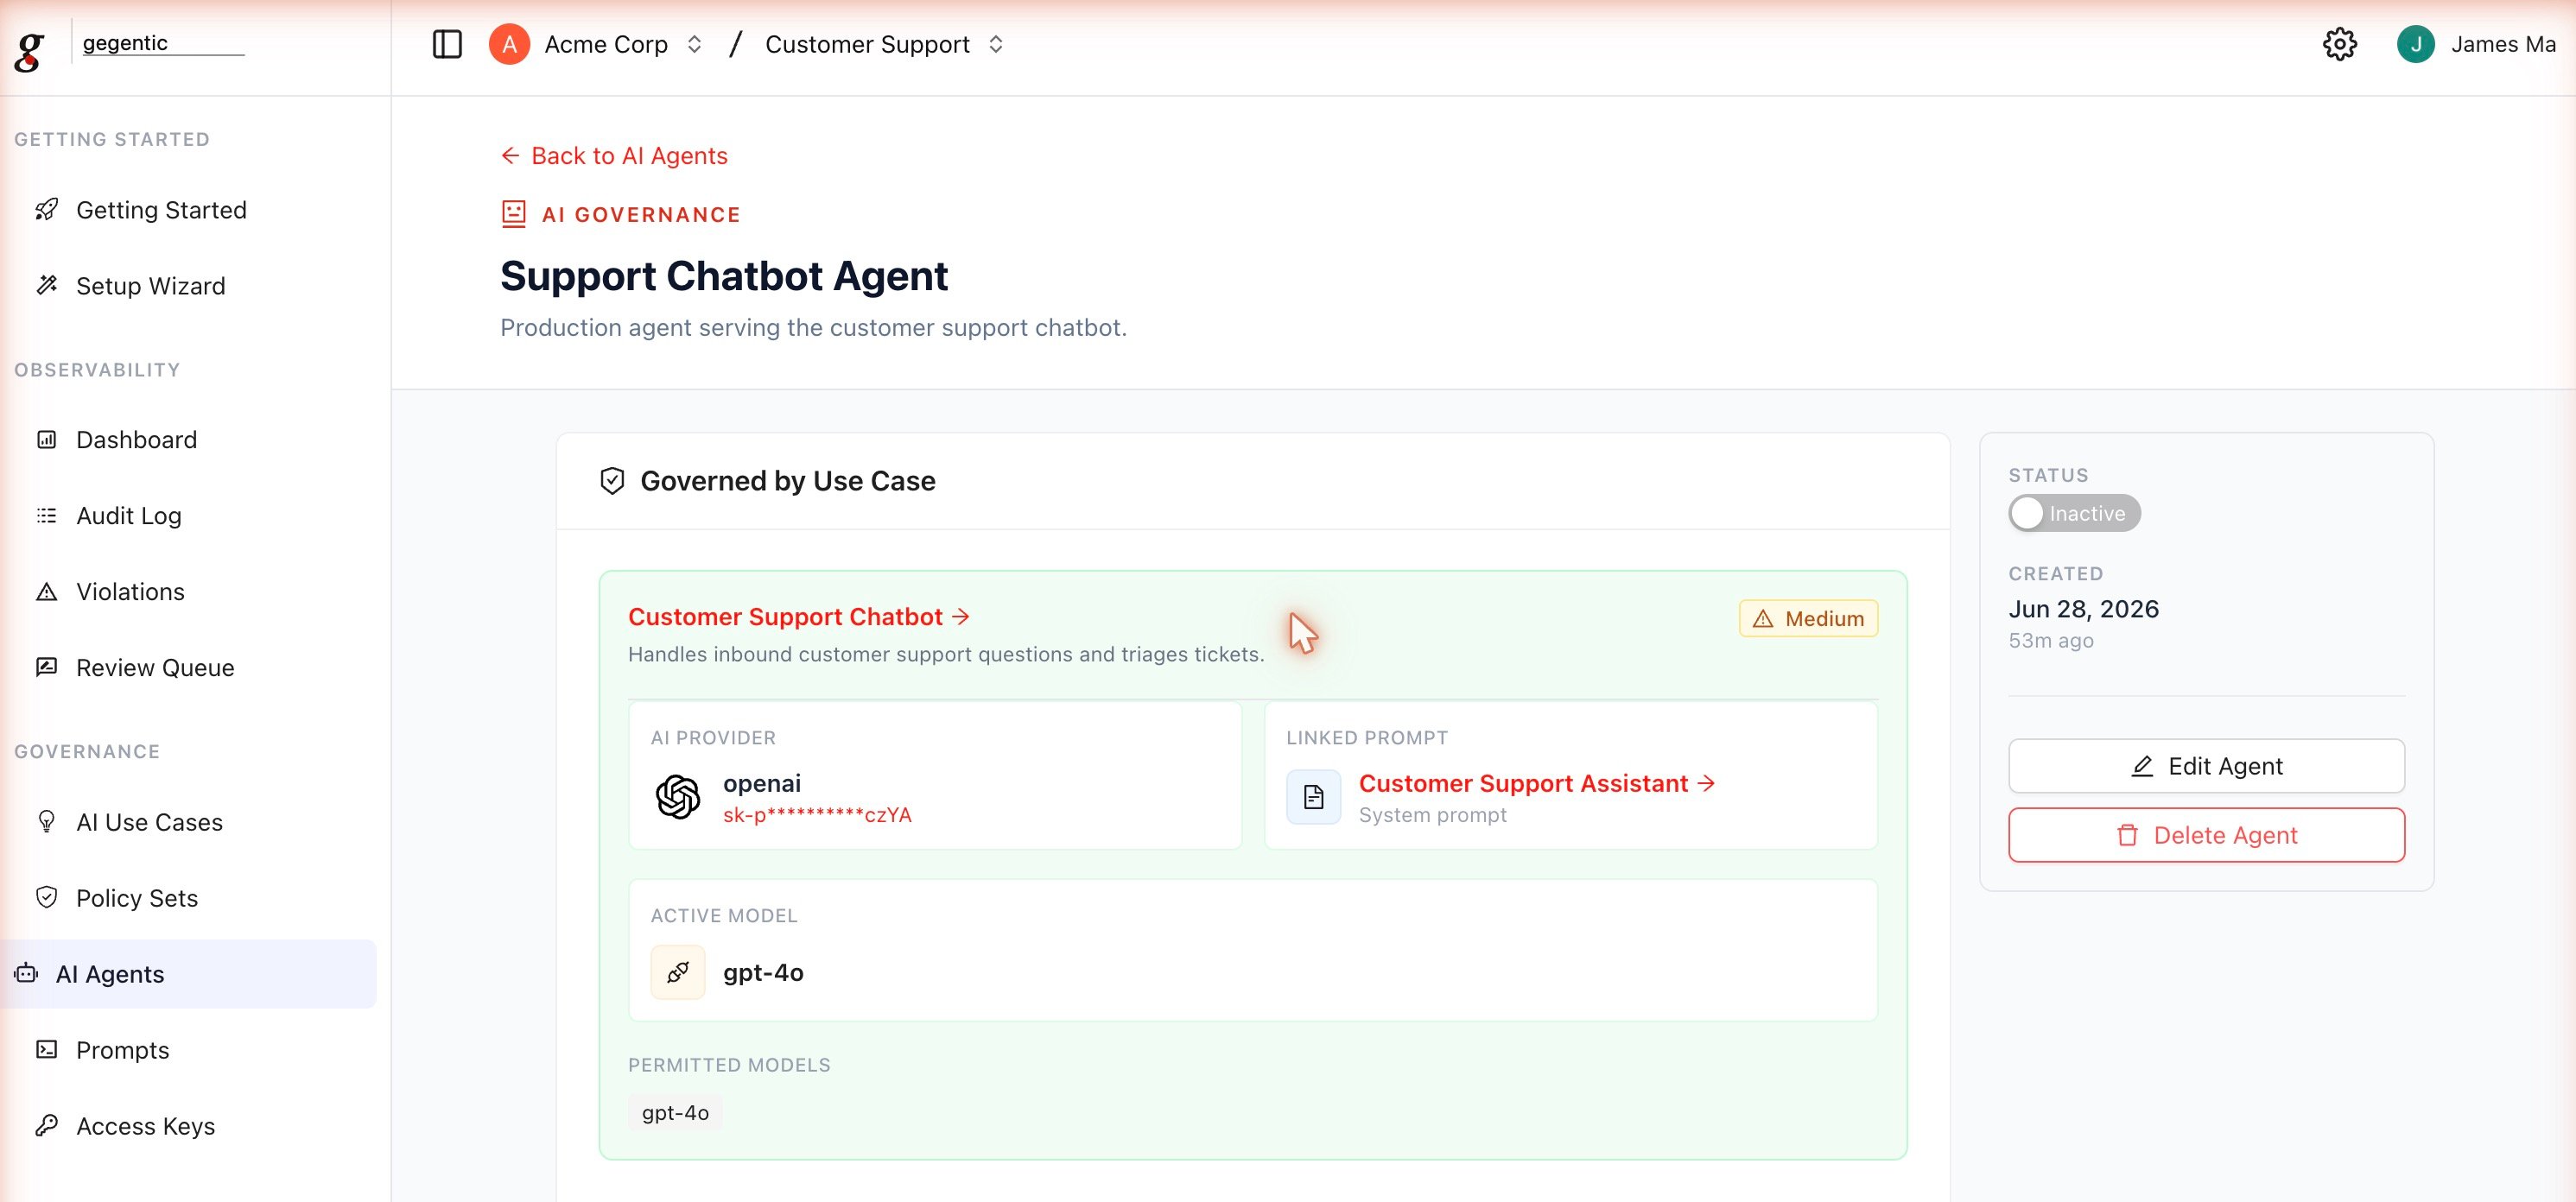 You can optionally override the inherited model or prompt at this step.
## 5. (Optional) Create a Policy Set
If you want rule-based screening on this agent's traffic, go to **Governance > Policy Sets** and create one. A [Policy Set](/governance/policy-sets) is a collection of Rules with a Draft → Pending Review → Active lifecycle. Once it's Active, attach it to your agent from the agent's settings.
You can skip this step and add a Policy Set to the agent later — it isn't required to make your first request.
## 6. Generate an Access Key
Go to **Governance > Access Keys** and select **Create**. Unlike a raw provider API key, an [Access Key](/governance/access-keys) is scoped to specific AI Agents and Prompts, not tied directly to a provider credential. Generation is a guided flow:
1. **Key Info** — name the key, optionally describe it, choose an **Environment**, and optionally set an expiry date.
2. **AI Agent Access** — scope to **all** agents or to the specific agent you created in step 4.
3. **Prompt Access** — scope to **all** prompts or a specific subset.
4. **Review & Generate** — confirm and generate.
You can optionally override the inherited model or prompt at this step.
## 5. (Optional) Create a Policy Set
If you want rule-based screening on this agent's traffic, go to **Governance > Policy Sets** and create one. A [Policy Set](/governance/policy-sets) is a collection of Rules with a Draft → Pending Review → Active lifecycle. Once it's Active, attach it to your agent from the agent's settings.
You can skip this step and add a Policy Set to the agent later — it isn't required to make your first request.
## 6. Generate an Access Key
Go to **Governance > Access Keys** and select **Create**. Unlike a raw provider API key, an [Access Key](/governance/access-keys) is scoped to specific AI Agents and Prompts, not tied directly to a provider credential. Generation is a guided flow:
1. **Key Info** — name the key, optionally describe it, choose an **Environment**, and optionally set an expiry date.
2. **AI Agent Access** — scope to **all** agents or to the specific agent you created in step 4.
3. **Prompt Access** — scope to **all** prompts or a specific subset.
4. **Review & Generate** — confirm and generate.
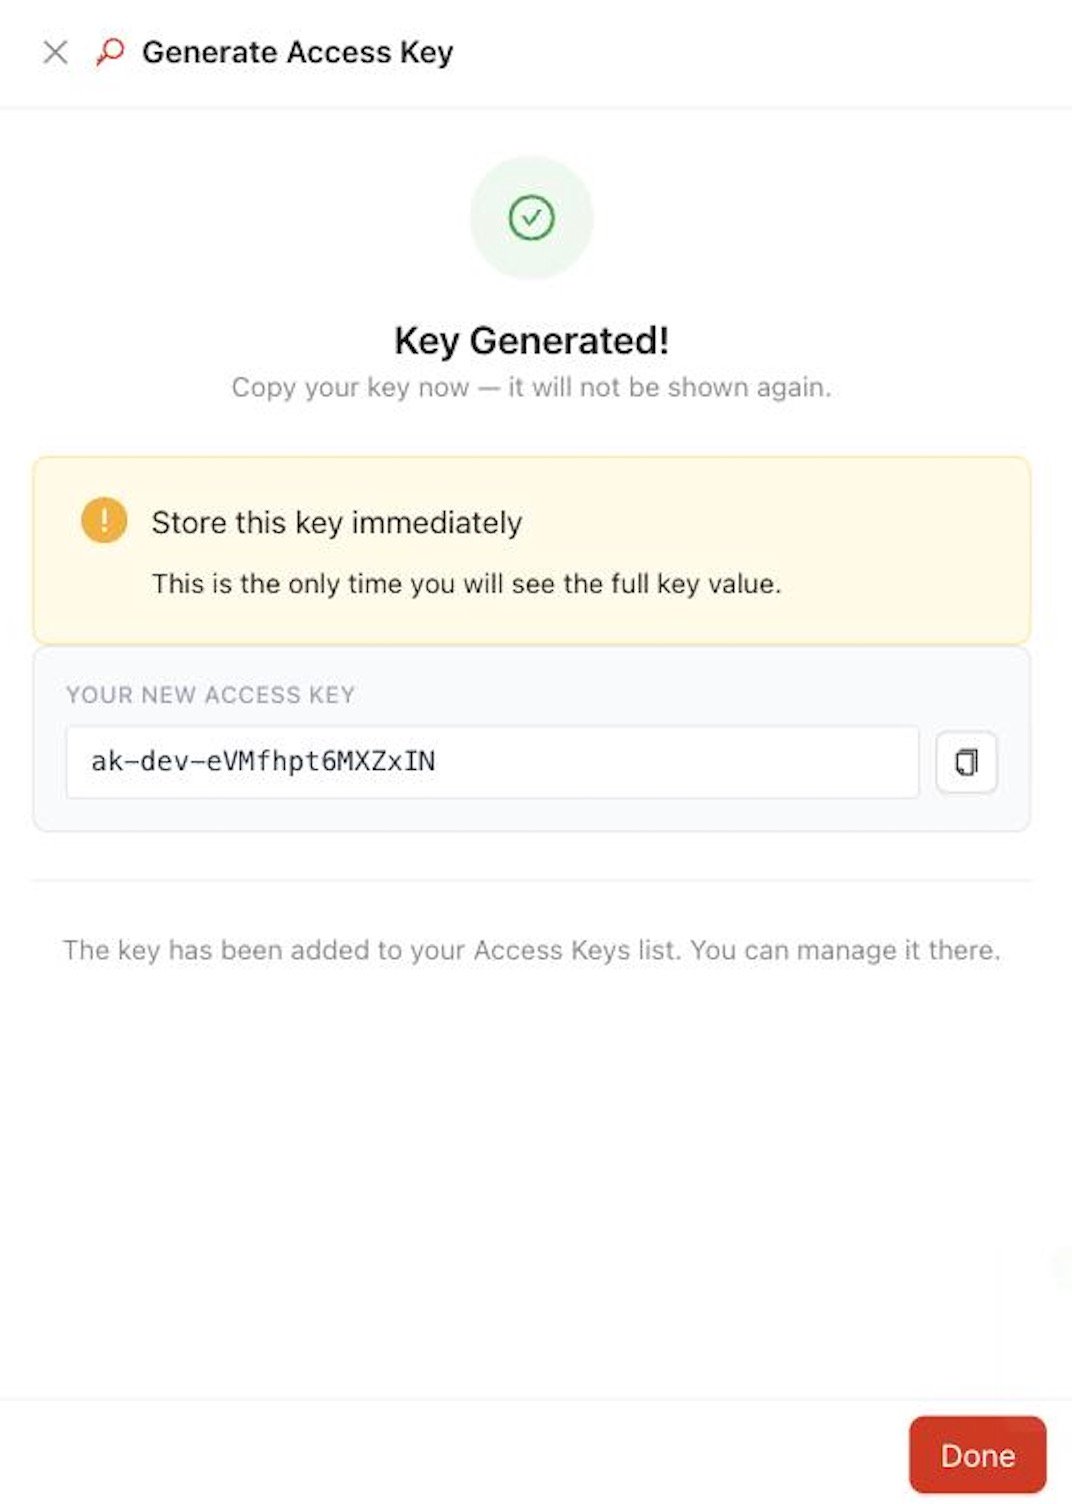 The key value is shown only once, immediately after generation. Copy and store it securely — Gegentica cannot show you the full value again.
## 7. Integrate Gegentica
Once your Access Key is wired in, requests will start showing up in your project's [Dashboard](/observability/overview) and [Audit Log](/observability/audit-log).
## 8. Next Steps
Now that you're up and running with Gegentica, dive into the rest of the platform:
The key value is shown only once, immediately after generation. Copy and store it securely — Gegentica cannot show you the full value again.
## 7. Integrate Gegentica
Once your Access Key is wired in, requests will start showing up in your project's [Dashboard](/observability/overview) and [Audit Log](/observability/audit-log).
## 8. Next Steps
Now that you're up and running with Gegentica, dive into the rest of the platform: